
I’ve had chickens for a long time now, and every year or two, I go to my local feed store or online hatchery and order some baby chicks so that I can keep a decent supply of fresh eggs for my family year-round. In recent years, due to a pandemic and economic scares, it seems that more and more folks are attempting to become self-sufficient on some level, and raising chickens is on the incline; therefore, being able to procure baby chicks at a reasonable price has been on the decline. Don’t get me wrong, I applaud all those gearing up for elf-sufficiency it is a good thing. But, in figuring out ways to reduce my expenses last year, I decided that I was going to incubate and hatch my own chickens. This is not something that a chicken farmer should jump right into if you want to be successful. There are a few things that need consideration and planning.
The first thing that should be decided on are your goals for incubating and hatching chicks. Are you doing it for personal use or profit, or maybe a combination? It should be understood that just because you are hatching chicks to continue with egg production, your hatch will most like;y include many male chickens. What will you do with all those roosters? You should consider as well, the type of bird you want to breed. Are you looking for strictly high egg producers or a combination of good egg layer/meat bird? Are you thinking that you can sell day-old chicks, pullets, roosters, and/or extra eggs? Are you looking for specific breed qualities and characteristics, or is a barnyard mix-breed ok with you? I have noticed that in the rural area I live in, there is a market for fresh eggs and pullets, which are nearing egg-laying maturity. I do have family members who would be interested in chickens for eating, so that helps with the question of what to do with unwanted roosters. And, of course, you should think about numbers. Will the cost of an incubator be less than the cost of purchased chicks?

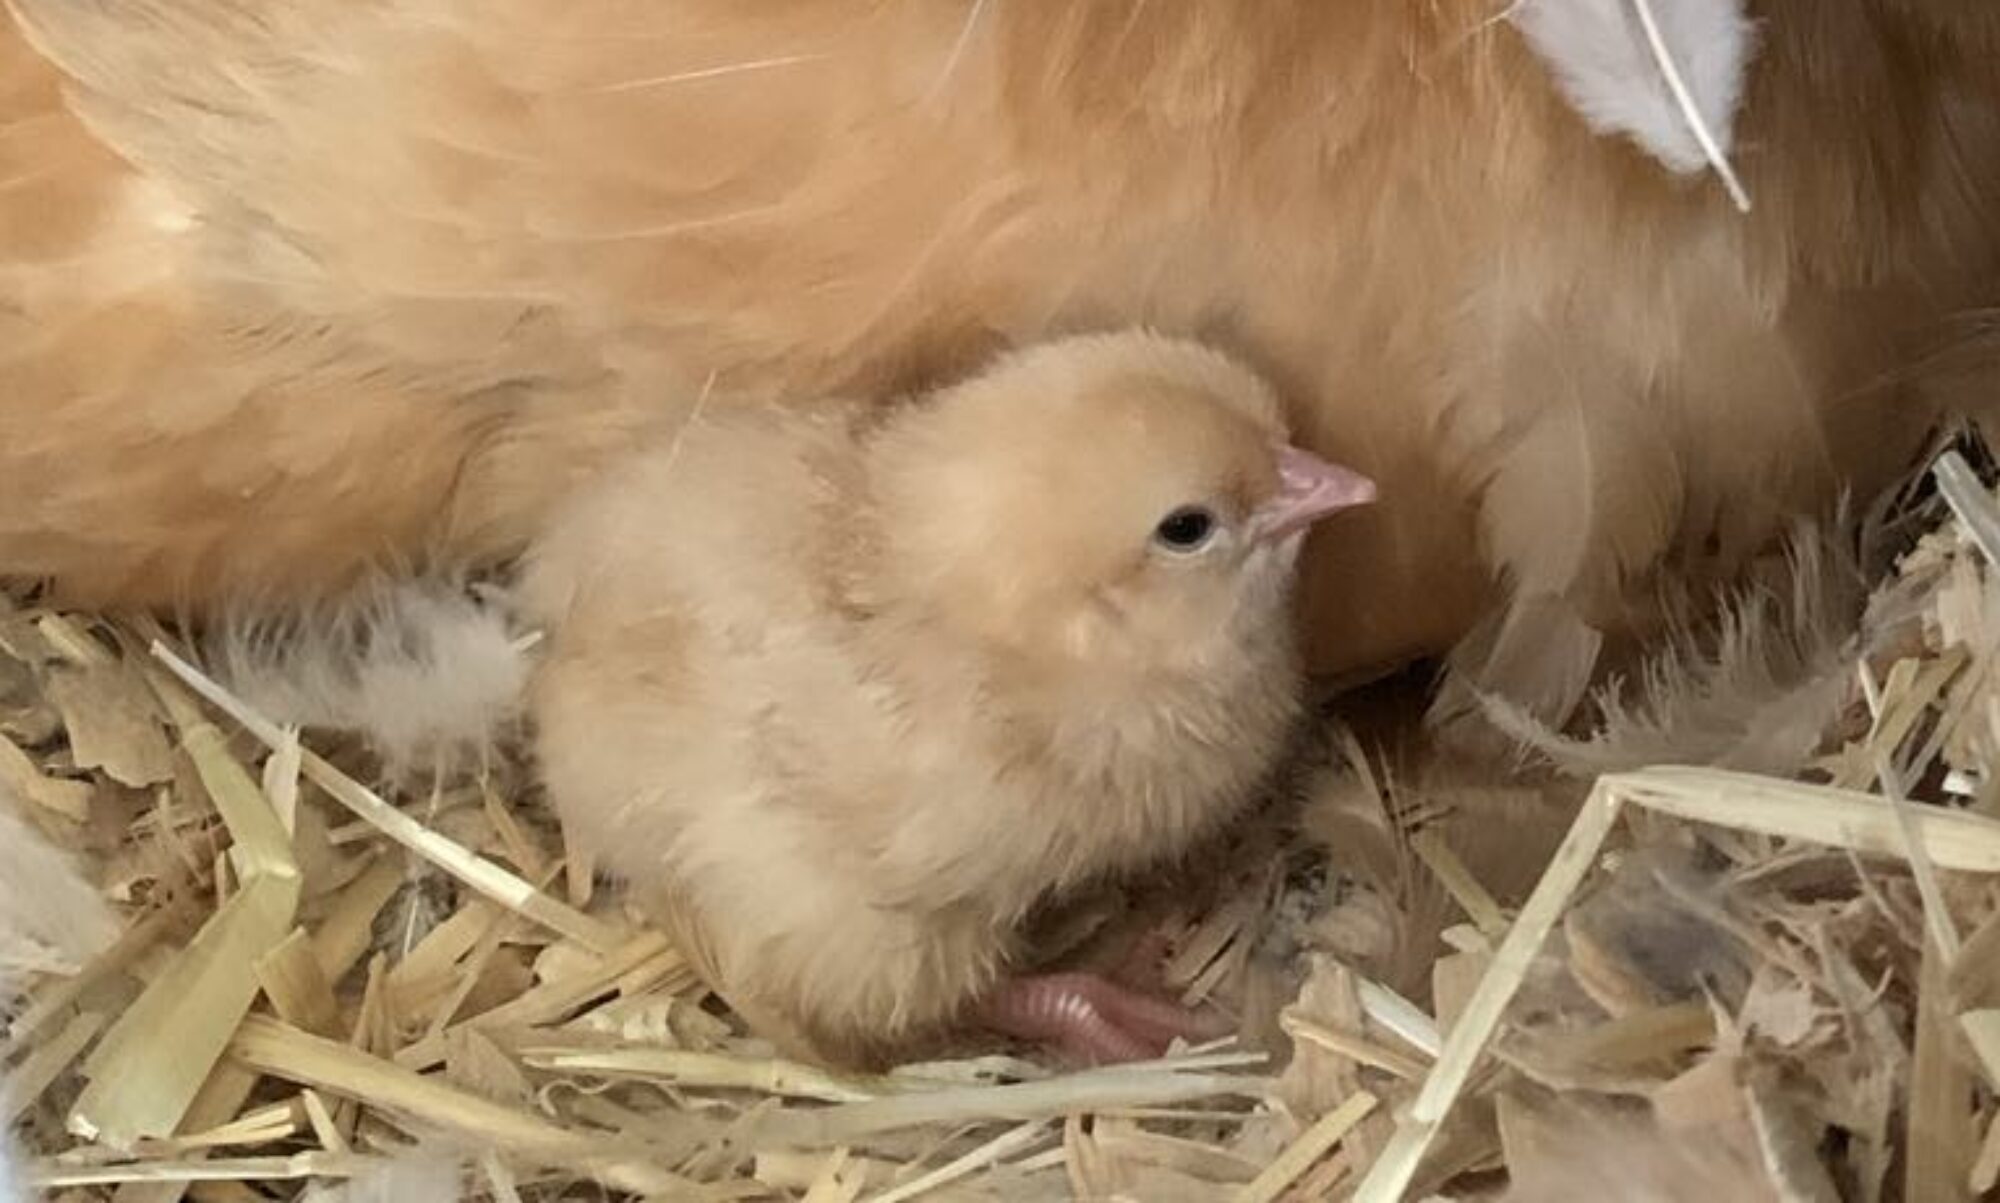
Last spring, when I decided that I was going to incubate and hatch my own chicks, I decided what my goals were: birds who were friendly, good brooders, above-average egg producers, and were also a good meat bird. I wanted hens who were good brooders so that I could rely on them to hatch and nurture chicks if that needed to be an option. I definitely want a good supply of eggs for my family, and a good meat bird is a must if I am looking for something to do with excess roosters. I decided on a breed of bird that I felt met these requirements, knowing that if I was happy with the results and decided to continue incubating and hatching chicks, I had a second breed of bird in mind that I would try next. So, in May of last year, I purchased ten Buff Orpingtons. As it turned out, one died and one is a rooster, thankfully. I have eight laying Orpington hens. They started laying mid November and continued laying through the winter. They are getting to the age where their eggs should be good for incubating and hatching.

At this point, I have been researching incubators. In choosing an incubator, it’s important to consider how many eggs and what type of eggs you are interested in hatching. I also want to hatch some duck eggs, so that will factor into my decision. Of course, price is a consideration, as are things like an automatic egg turner, stable temperature and humidity controls, an external water reservoir, egg visibility, and an egg candler. Be sure to read and watch lots of reviews on the incubators you are considering, the good and the bad. What someone deems a fault, you might be able to live with if the price is right or there is a suitable trade-off. Make sure to note any necessary accessories that might be required. Think about where you will house your incubator while it is operational. It should be somewhere where the room temperature is fairly consistent, is out of the way of other animals and is located where you will be inclined to check on it throughout the day.

Once you have your incubator all set up and it is working, it is time to start accumulating your fertilized eggs. Of course, it goes without saying, there must be at least one rooster in your flock in order for you to obtain fertile eggs. No rooster, no fertile eggs. An interesting fact regarding the mating ritual of chickens is that once the sperm from the rooster is deposited into the hen, the sperm can be stored inside the hen to fertilize eggs for days and even weeks after mating occurred. It takes a minimum of 36 hours for a hen to produce a hatchable fertile egg after mating. Once a hen lays an egg, it can be collected and stored at a cooler temperature, generally between 55 degrees F and 65 degrees F, for a period of about two weeks. The cooler temperature suspends the growth of the embryo inside the egg. This allows for the mother hen to be able to lay a nice clutch of eggs over a 2 week period and then begin to incubate the eggs and have them all hatch at about the same time. When the mother hens sits on the nest full-time, the increase in temperature due to her body heat will end the growth suspension, and embryonic development will begin once again. Pretty cool! Once a hen selects a nest for her eggs, she will lay one egg per day. Each day that she returns to the nest to lay an additional egg, she will instinctively turn all of the eggs in the nest. There are strands of white tissue called chalazae inside the egg that hold the yolk centered. Turning the egg daily keeps these strands from stretching and continues to keep the yolk centered, which is a beneficial position for the chick when they get ready to hatch. This act of gentle turning should be recreated as you collect eggs for your incubator.

My plan is to collect about two dozen Orpington eggs over a period of 5 or 6 days. I will store them in egg cartons with the big round end pointing up. This is where the air sac will form and from where the chick will begin breathing just before breaking out of its shell. I will prop up one end of the egg carton slightly, store in a safe, cool location in my home, and turn the eggs once daily until I’m ready to start the incubation process. It is recommended that you use clean eggs that have not been washed. You want the bloom to be intact during the incubating process to discourage any bacteria from entering the egg and causing it to go bad. Your eggs should have no cracks nor be misshapen. Collect eggs of average size and weight for your chicken breed. Extra large eggs (possible double yolks) and small eggs have a greater chance of not developing properly or hatching. Do not place your eggs in the refrigerator as the extreme cold temperatures will most likely render your eggs unviable. Eggs purchased from the grocery store are generally not considered to be fertile eggs, so don’t waste your time trying, plus they have been washed and refrigerated. Making sure that you have attainable goals, a reliable incubator, and the best eggs possible will certainly increase the likelihood of a successful hatch.

Note: There are many videos available regarding the incubating of chicken eggs. One of the authors that I found to be very informative is “Chickens In My Garden”.


